You are cordially invited to make your outside vent tools more user friendly and efficient. The Halligan and 6′ hook has long been the baseline set of tools for the outside vent position. In my fire department the OV position is the “ladders firefighter” (FF sitting behind the driver). This position has a large amount of duties to accomplish when arriving as a first due truck. The driver is the other part of this two person team but we routinely operate by ourselves around the outside of the building performing similar duties. The only time we strictly operate together is during vertical ventilation or during vent enter search. The ladders firefighter will be laddering above grade windows, removing window bars, forcing the c-side door for egress, and performing a horizontal vent when needed.
This gives you a general idea of how that seat works for us and why this position carries a certain tool compliment. When I am riding Ladders I carry a Pig in my belt, with a 6’hook married to a Halligan. The tool in my belt along with the Halligan married to the 6′ hook allows for maximum efficiency because I still have a free hand to bring ladders to the building each time I walk to the truck. I think it is poor practice as an outside vent firefighter to only carry a hook and then have to return to the truck for a Halligan to force the c-side door or remove stubborn window bars. Both which are critical duties that should be accomplished in the first few minutes of our members operating interior.
Here’s the solution for us, and by no means did I invent this. Companies all over the country have been utilizing chain links to marry their hook and Halligan long before I was even in the fire service. I get a lot of questions and emails about this concept and hope I can make a few peoples jobs a little easier.
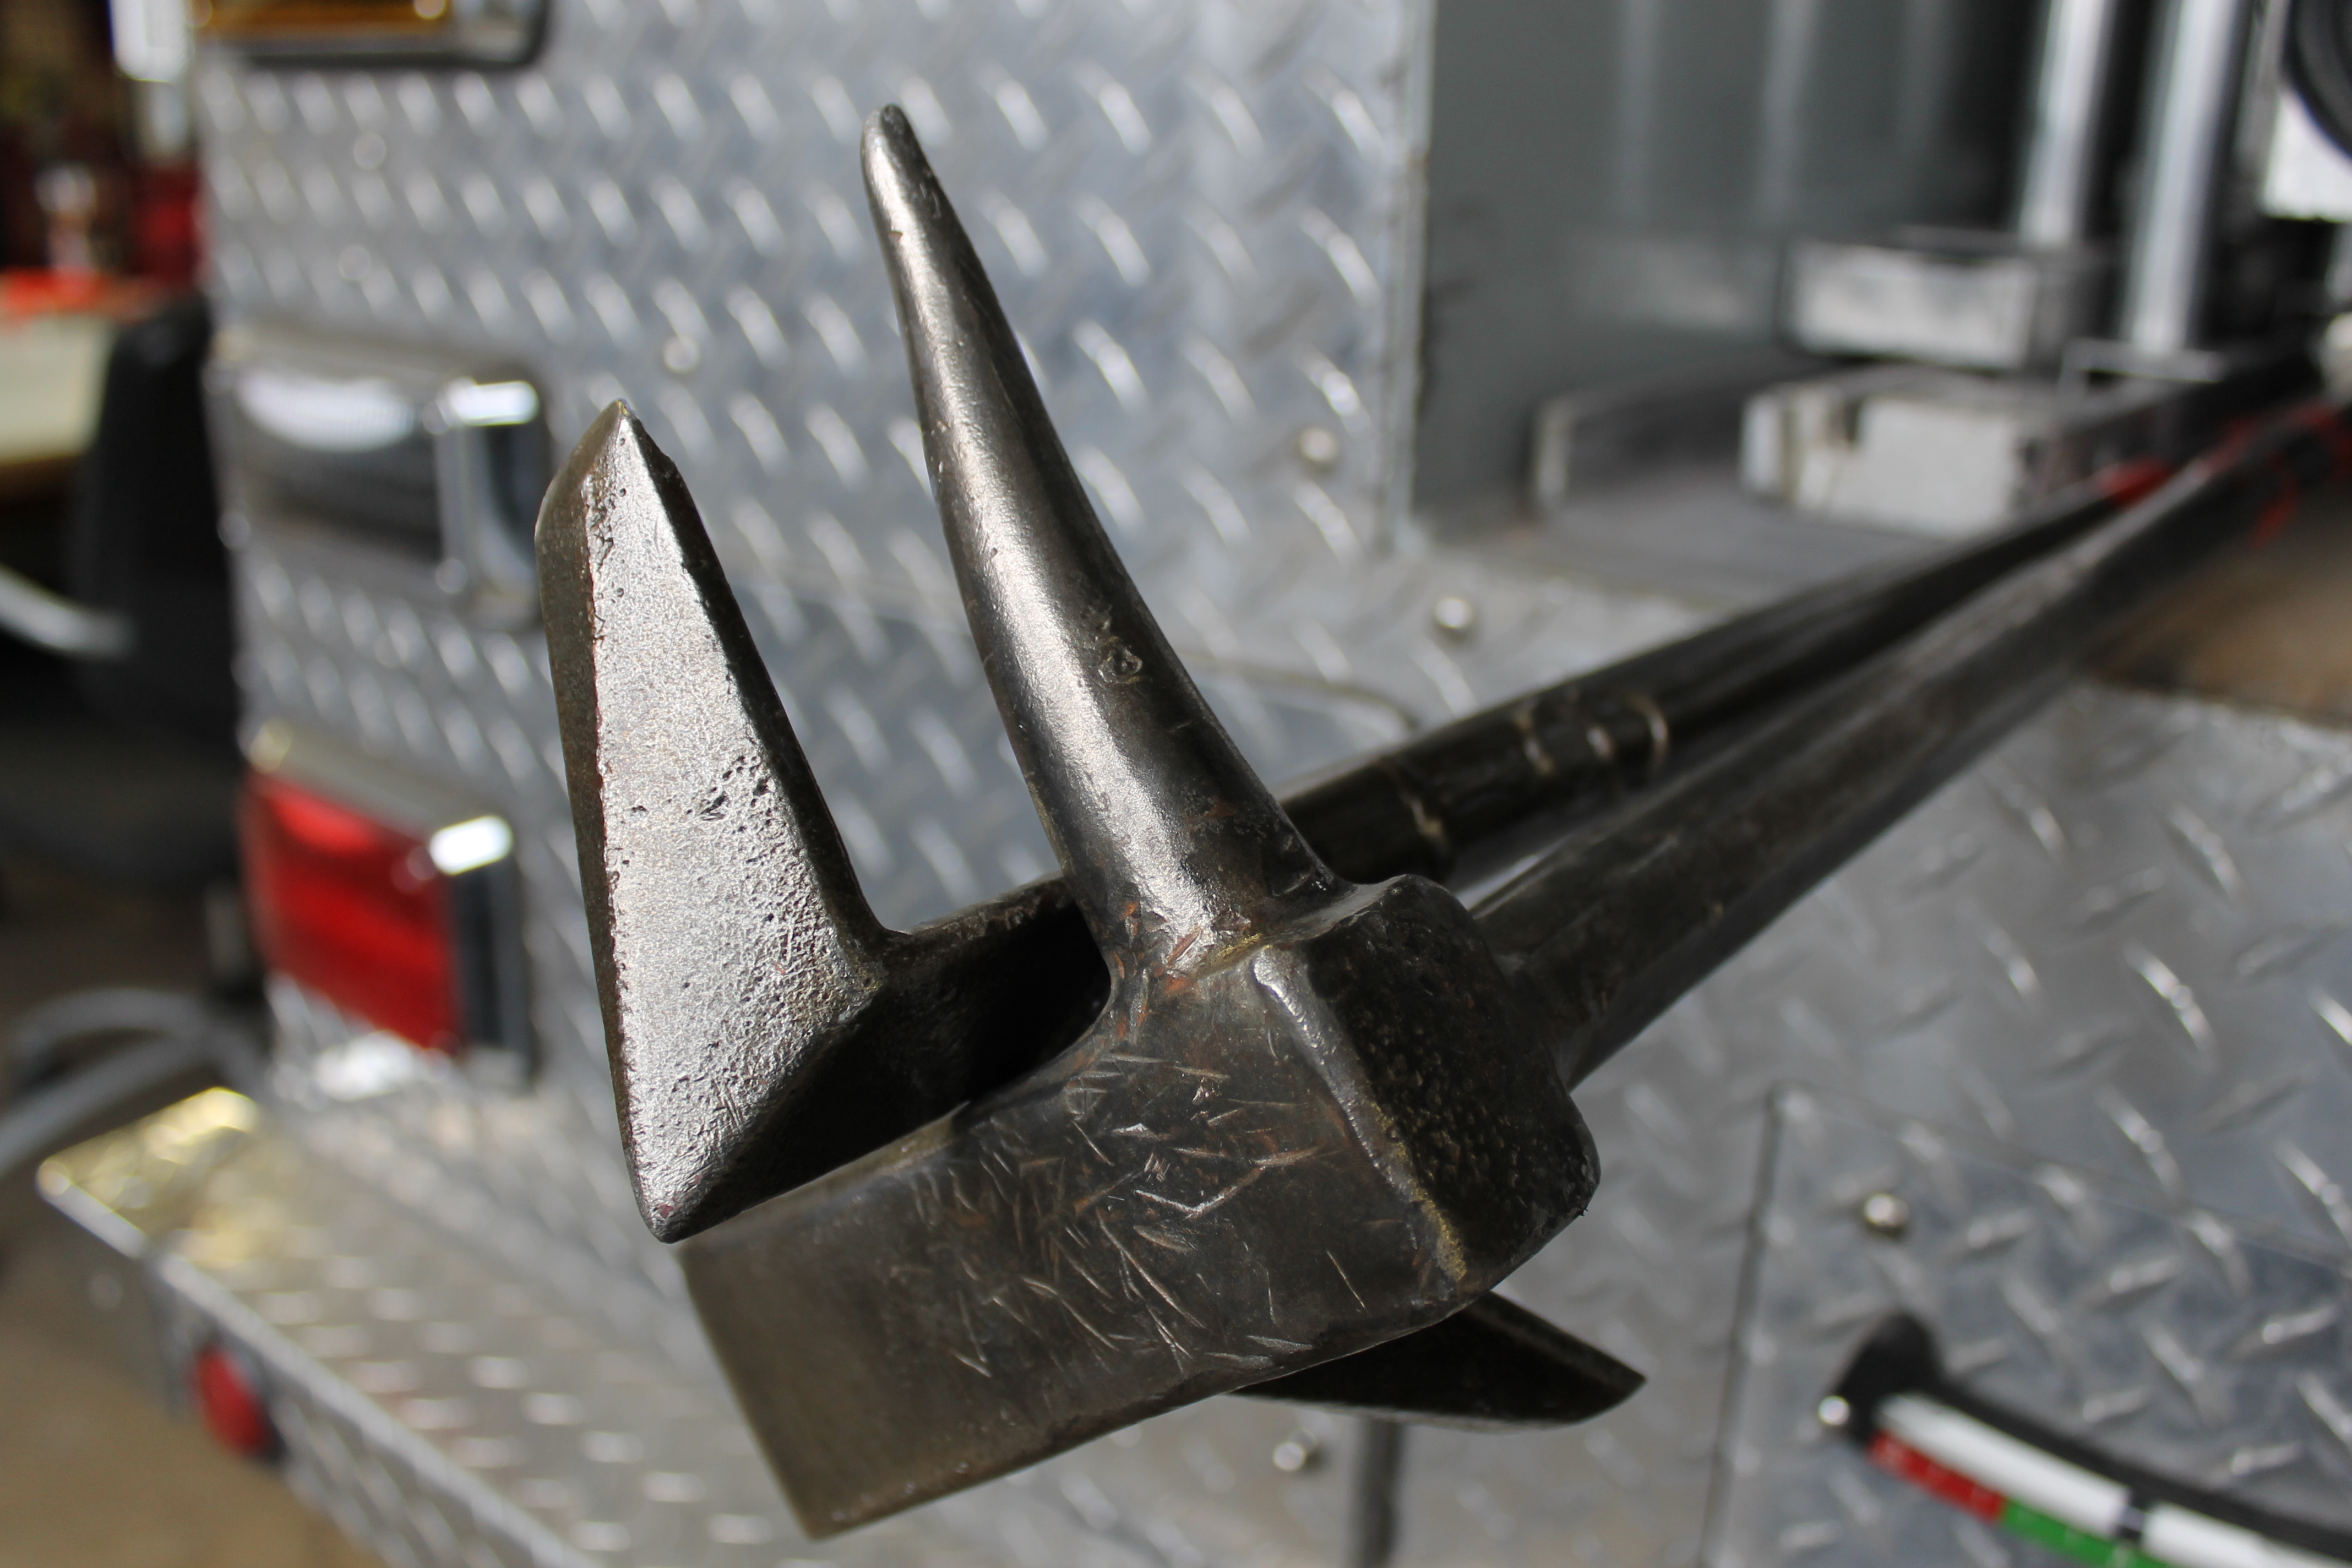
It’s a simple fix and we have used it on several hooks for many years. By welding a chain link at the appropriate height on the hook it allows you to put the forks of the Halligan over the chain link, then squeeze the tools and slam the base of the hook on the ground. It will cause the forks to bite into the chain link and creates a very tight bond with the tools.

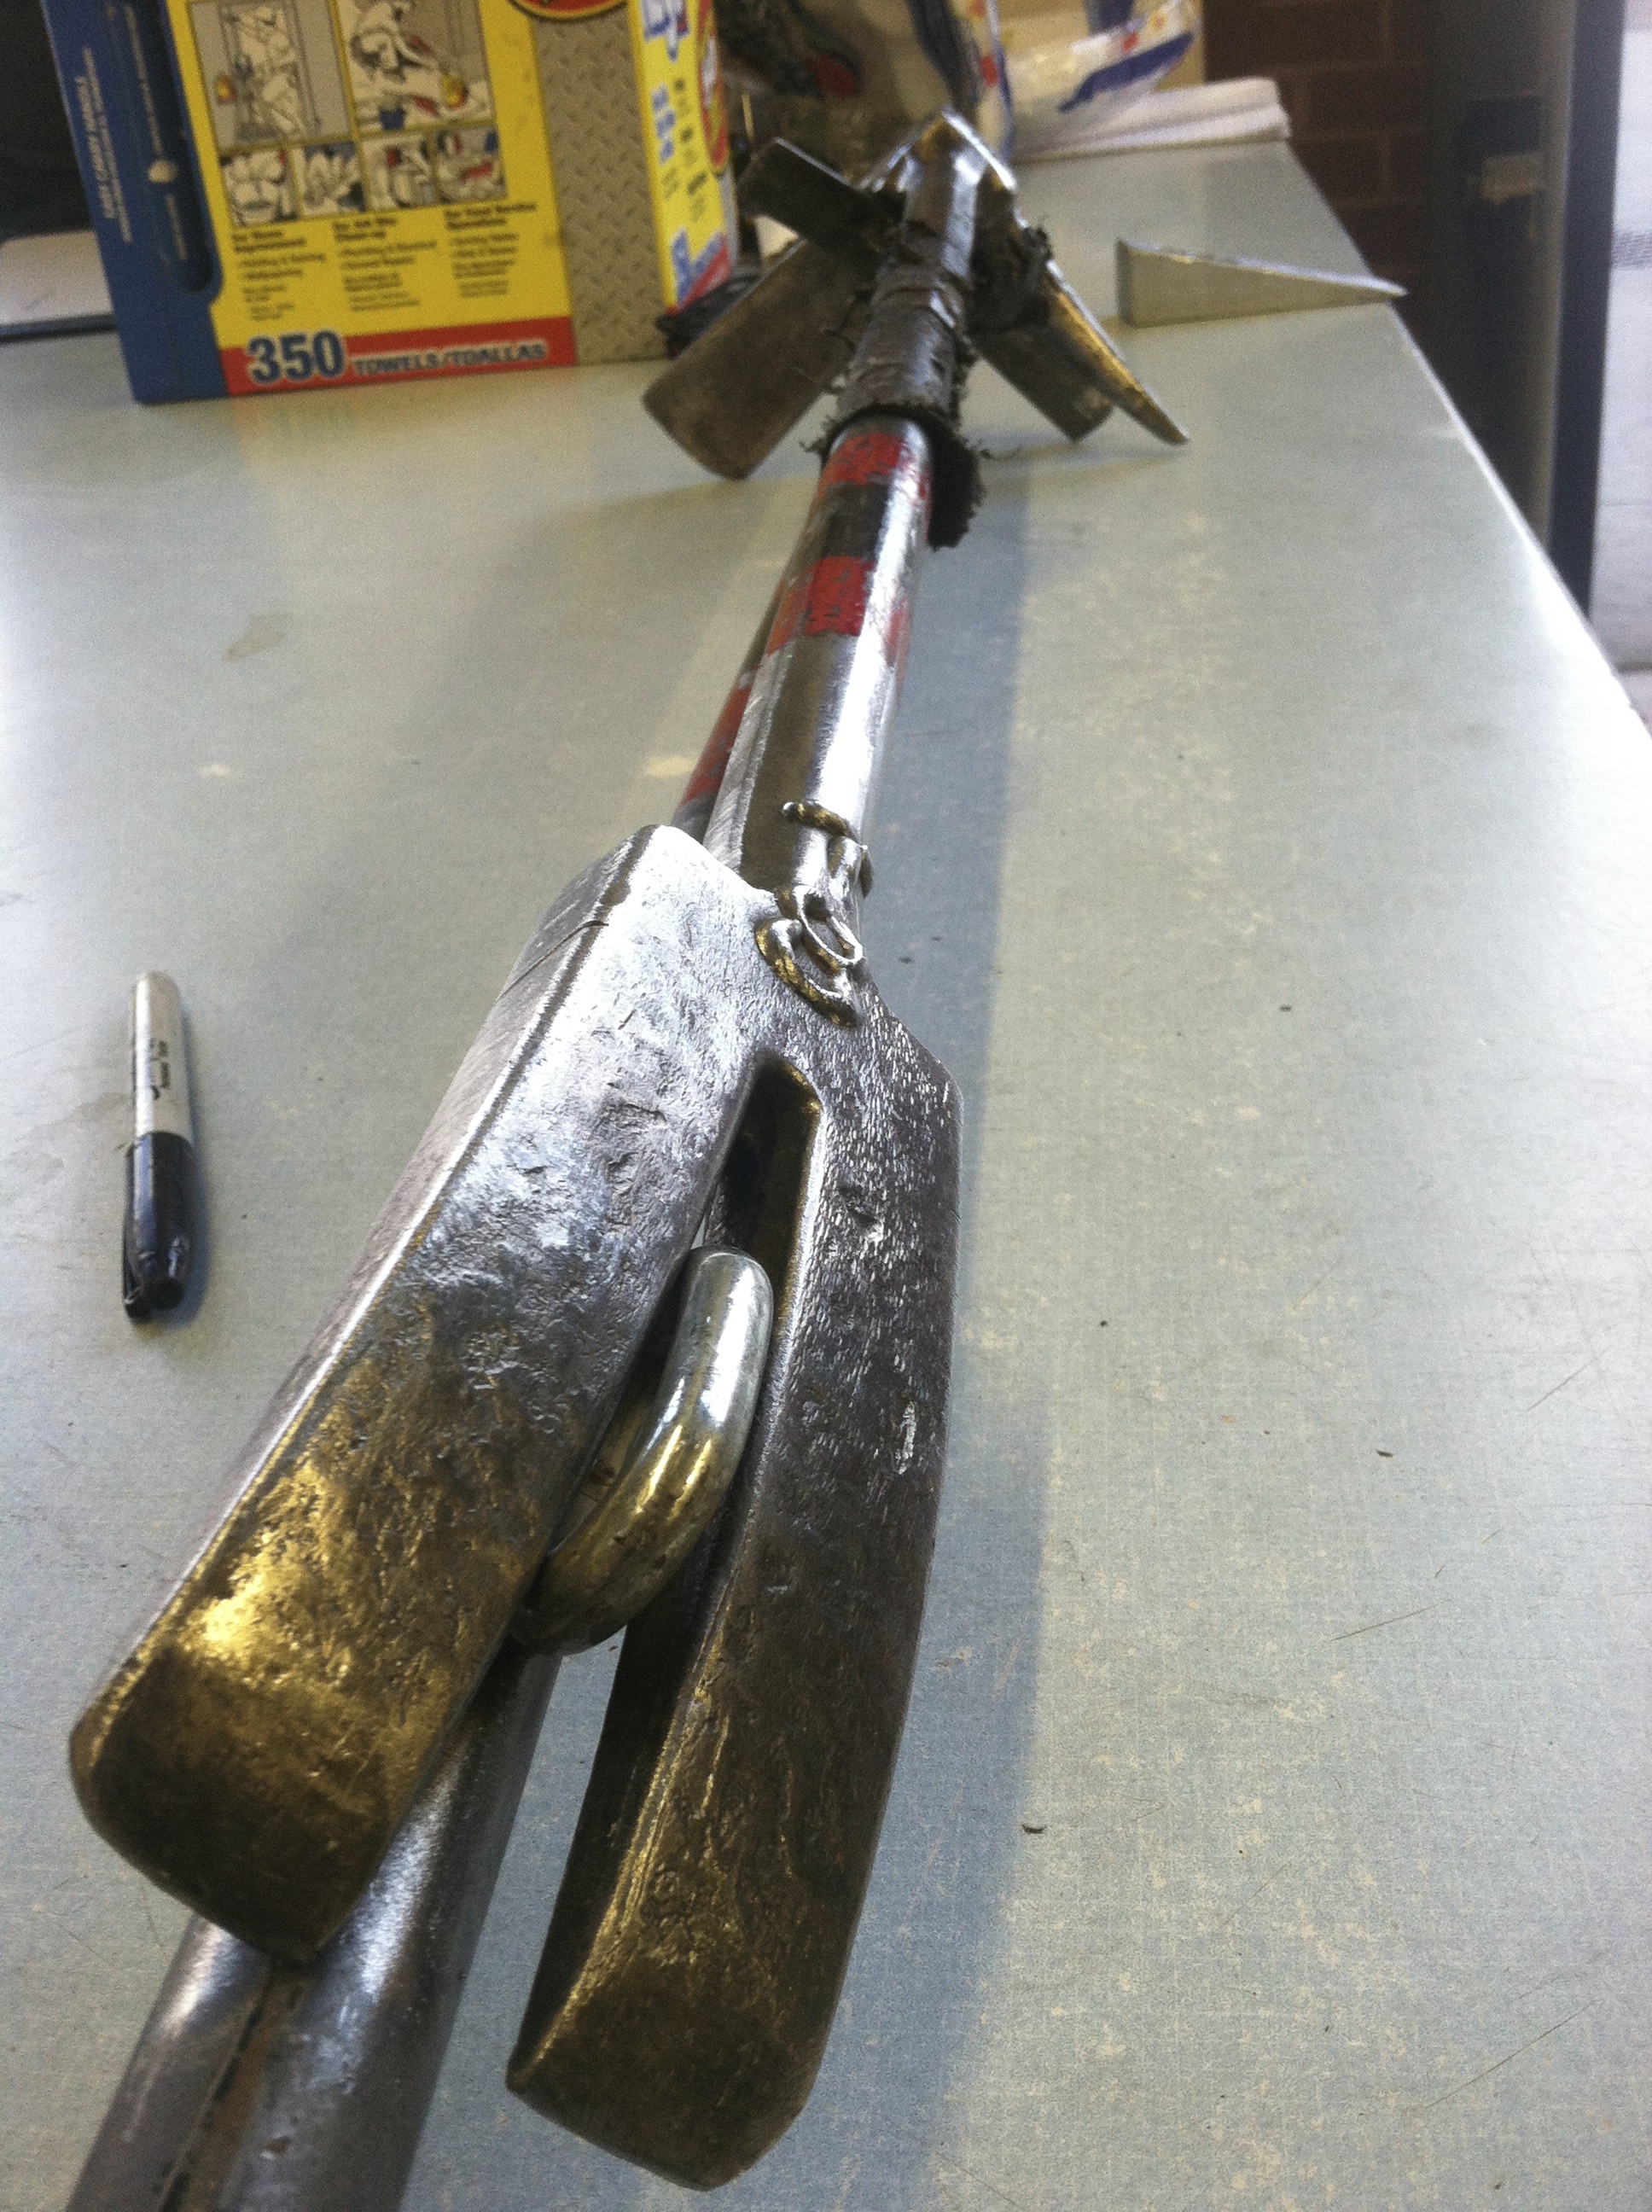
This creates a very easy one hand carry of the tools and reduces hand fatigue. If you currently don’t have these tools married you know that you have to keep a tight grip on them and it is not uncommon for the tools to separate half way to your target. This will be eliminated with the chain link. The bond is tight enough that once you get to your location you very rarely can pull them apart by hand. If I am on concrete or asphalt I will just throw the tools on the ground while I throw my ladder. The impact on the ground will separate them. The other option is to flip them upside down like the photo below and bump the head of the roof hook on hard ground or against the foundation of the house, etc. This will also easily separate them.

There is no set measurement for the chain link that I can give you. This article is obviously on a Pro Bar, but it is going to vary by the brand of Halligan. There are Halligans out there that this will not work with. If you are using a Pro Bar there is some variances on this measurement based on the age of the Pro Bar. I like to make this chain so that all of them will marry up regardless of age.
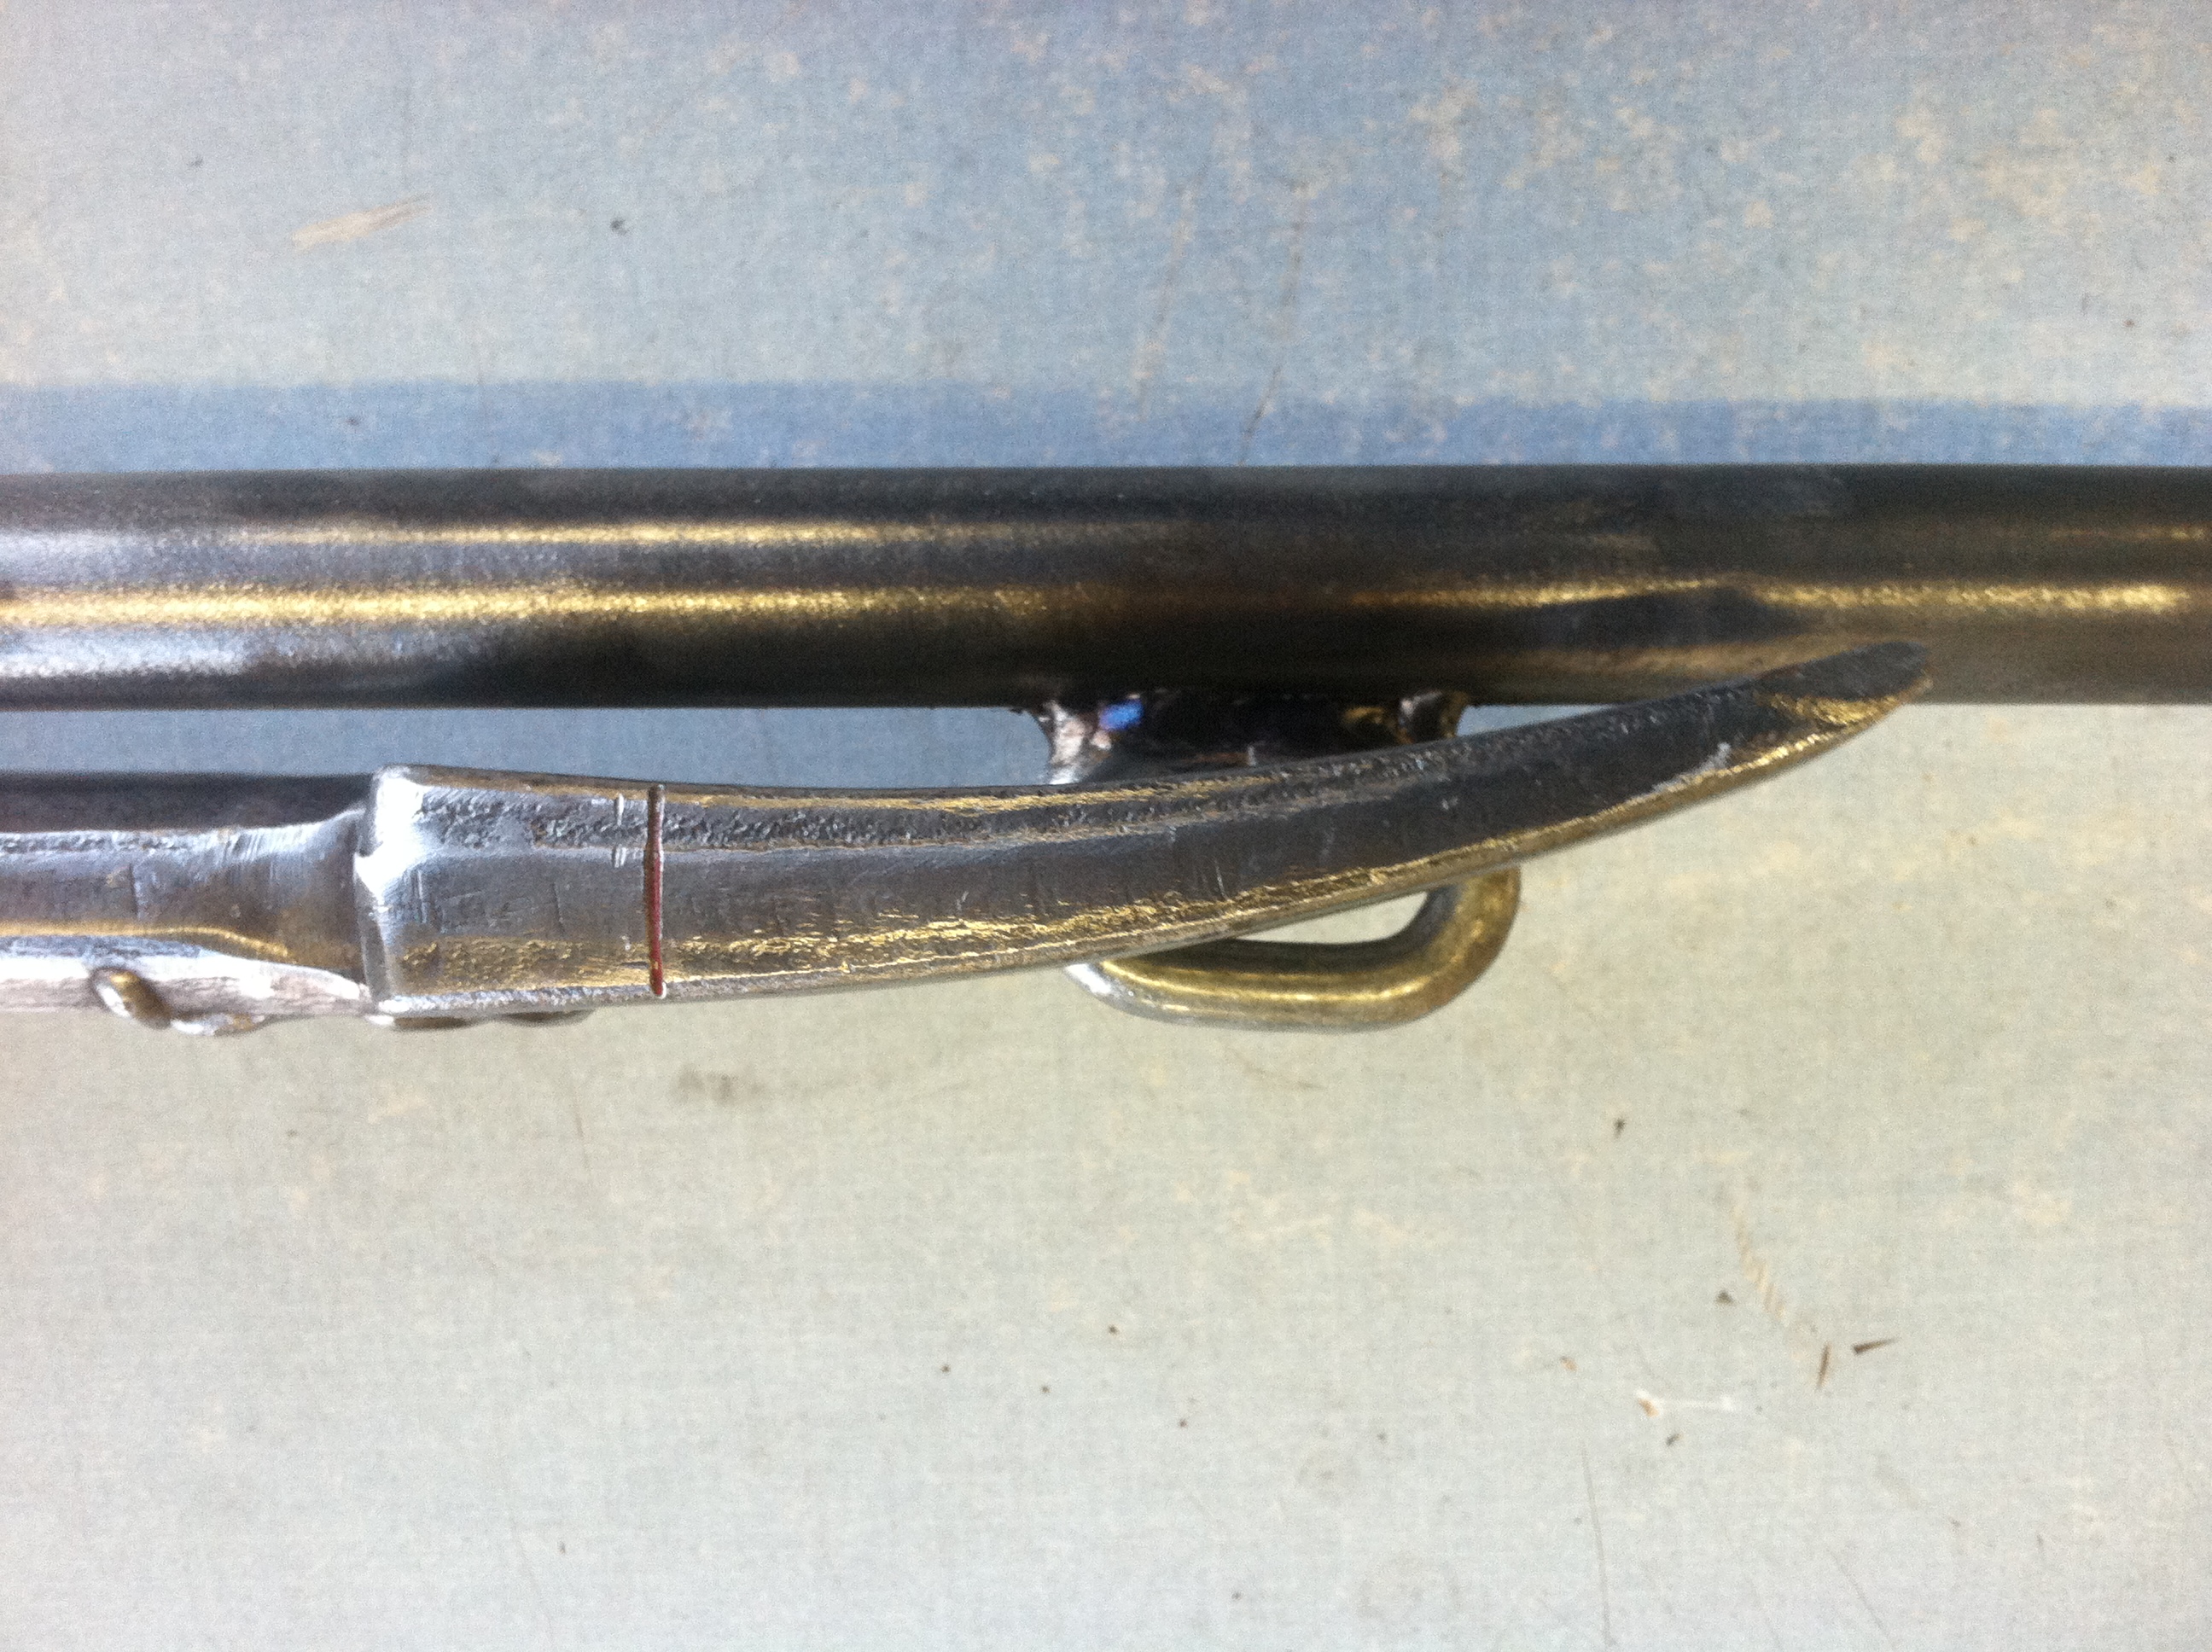
To get your spacing right, marry up the Halligan with the hook in one hand and slide your chain link in between the forks with the other hand. If the Halligan is pulled down flush to the hook now is the time to give it some space. Your goal is to leave some space between the bottom of the adze where it will touch the top of the hook. The picture below is taken with the Halligan just lightly sitting on the top of the chain. If you leave about a 1/2 inch where that dirty fat finger is, you will end up with enough room to give a nice solid bite on the chain link when you slam the base on the ground.
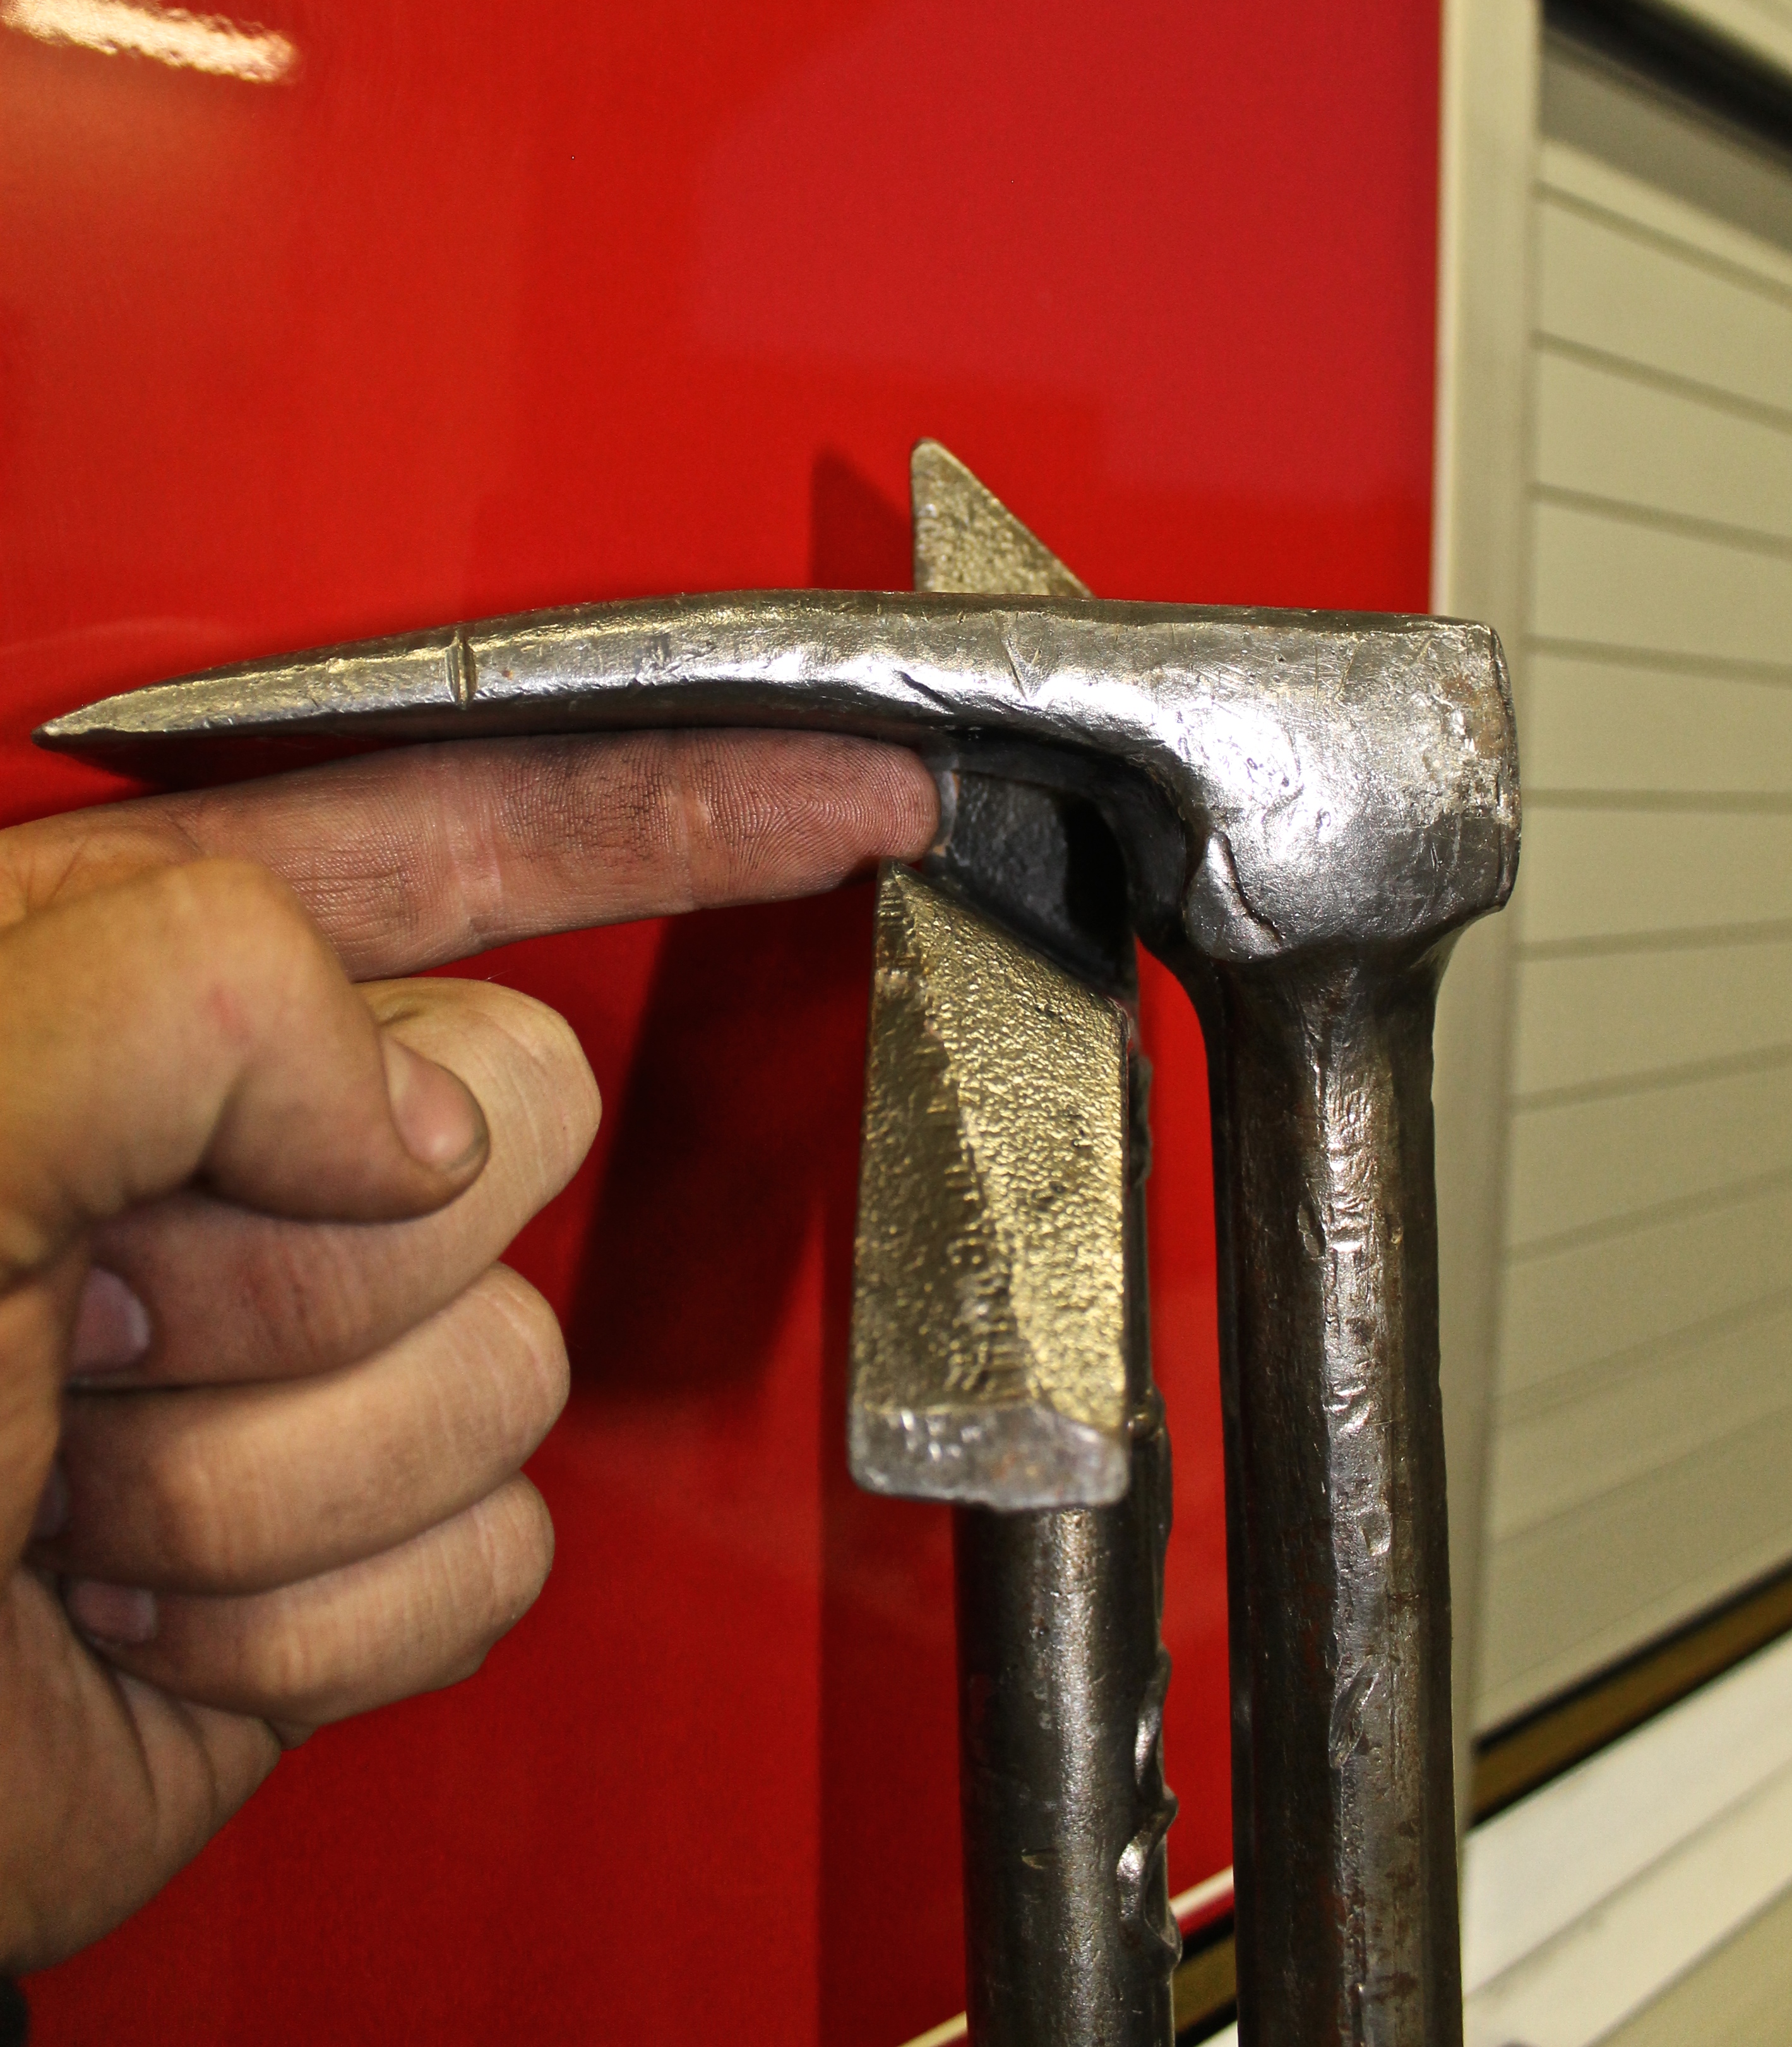
If you don’t leave enough space the Halligan will bounce off the top of the hook before you ever get a bite. If you are unsure of this, lean towards a little too much space rather than too little. Too much space will still marry the tools together when you bite the chain, even if there is a left over space between the tools. Too little will cause the Halligan to bounce off the hook before it sets properly.

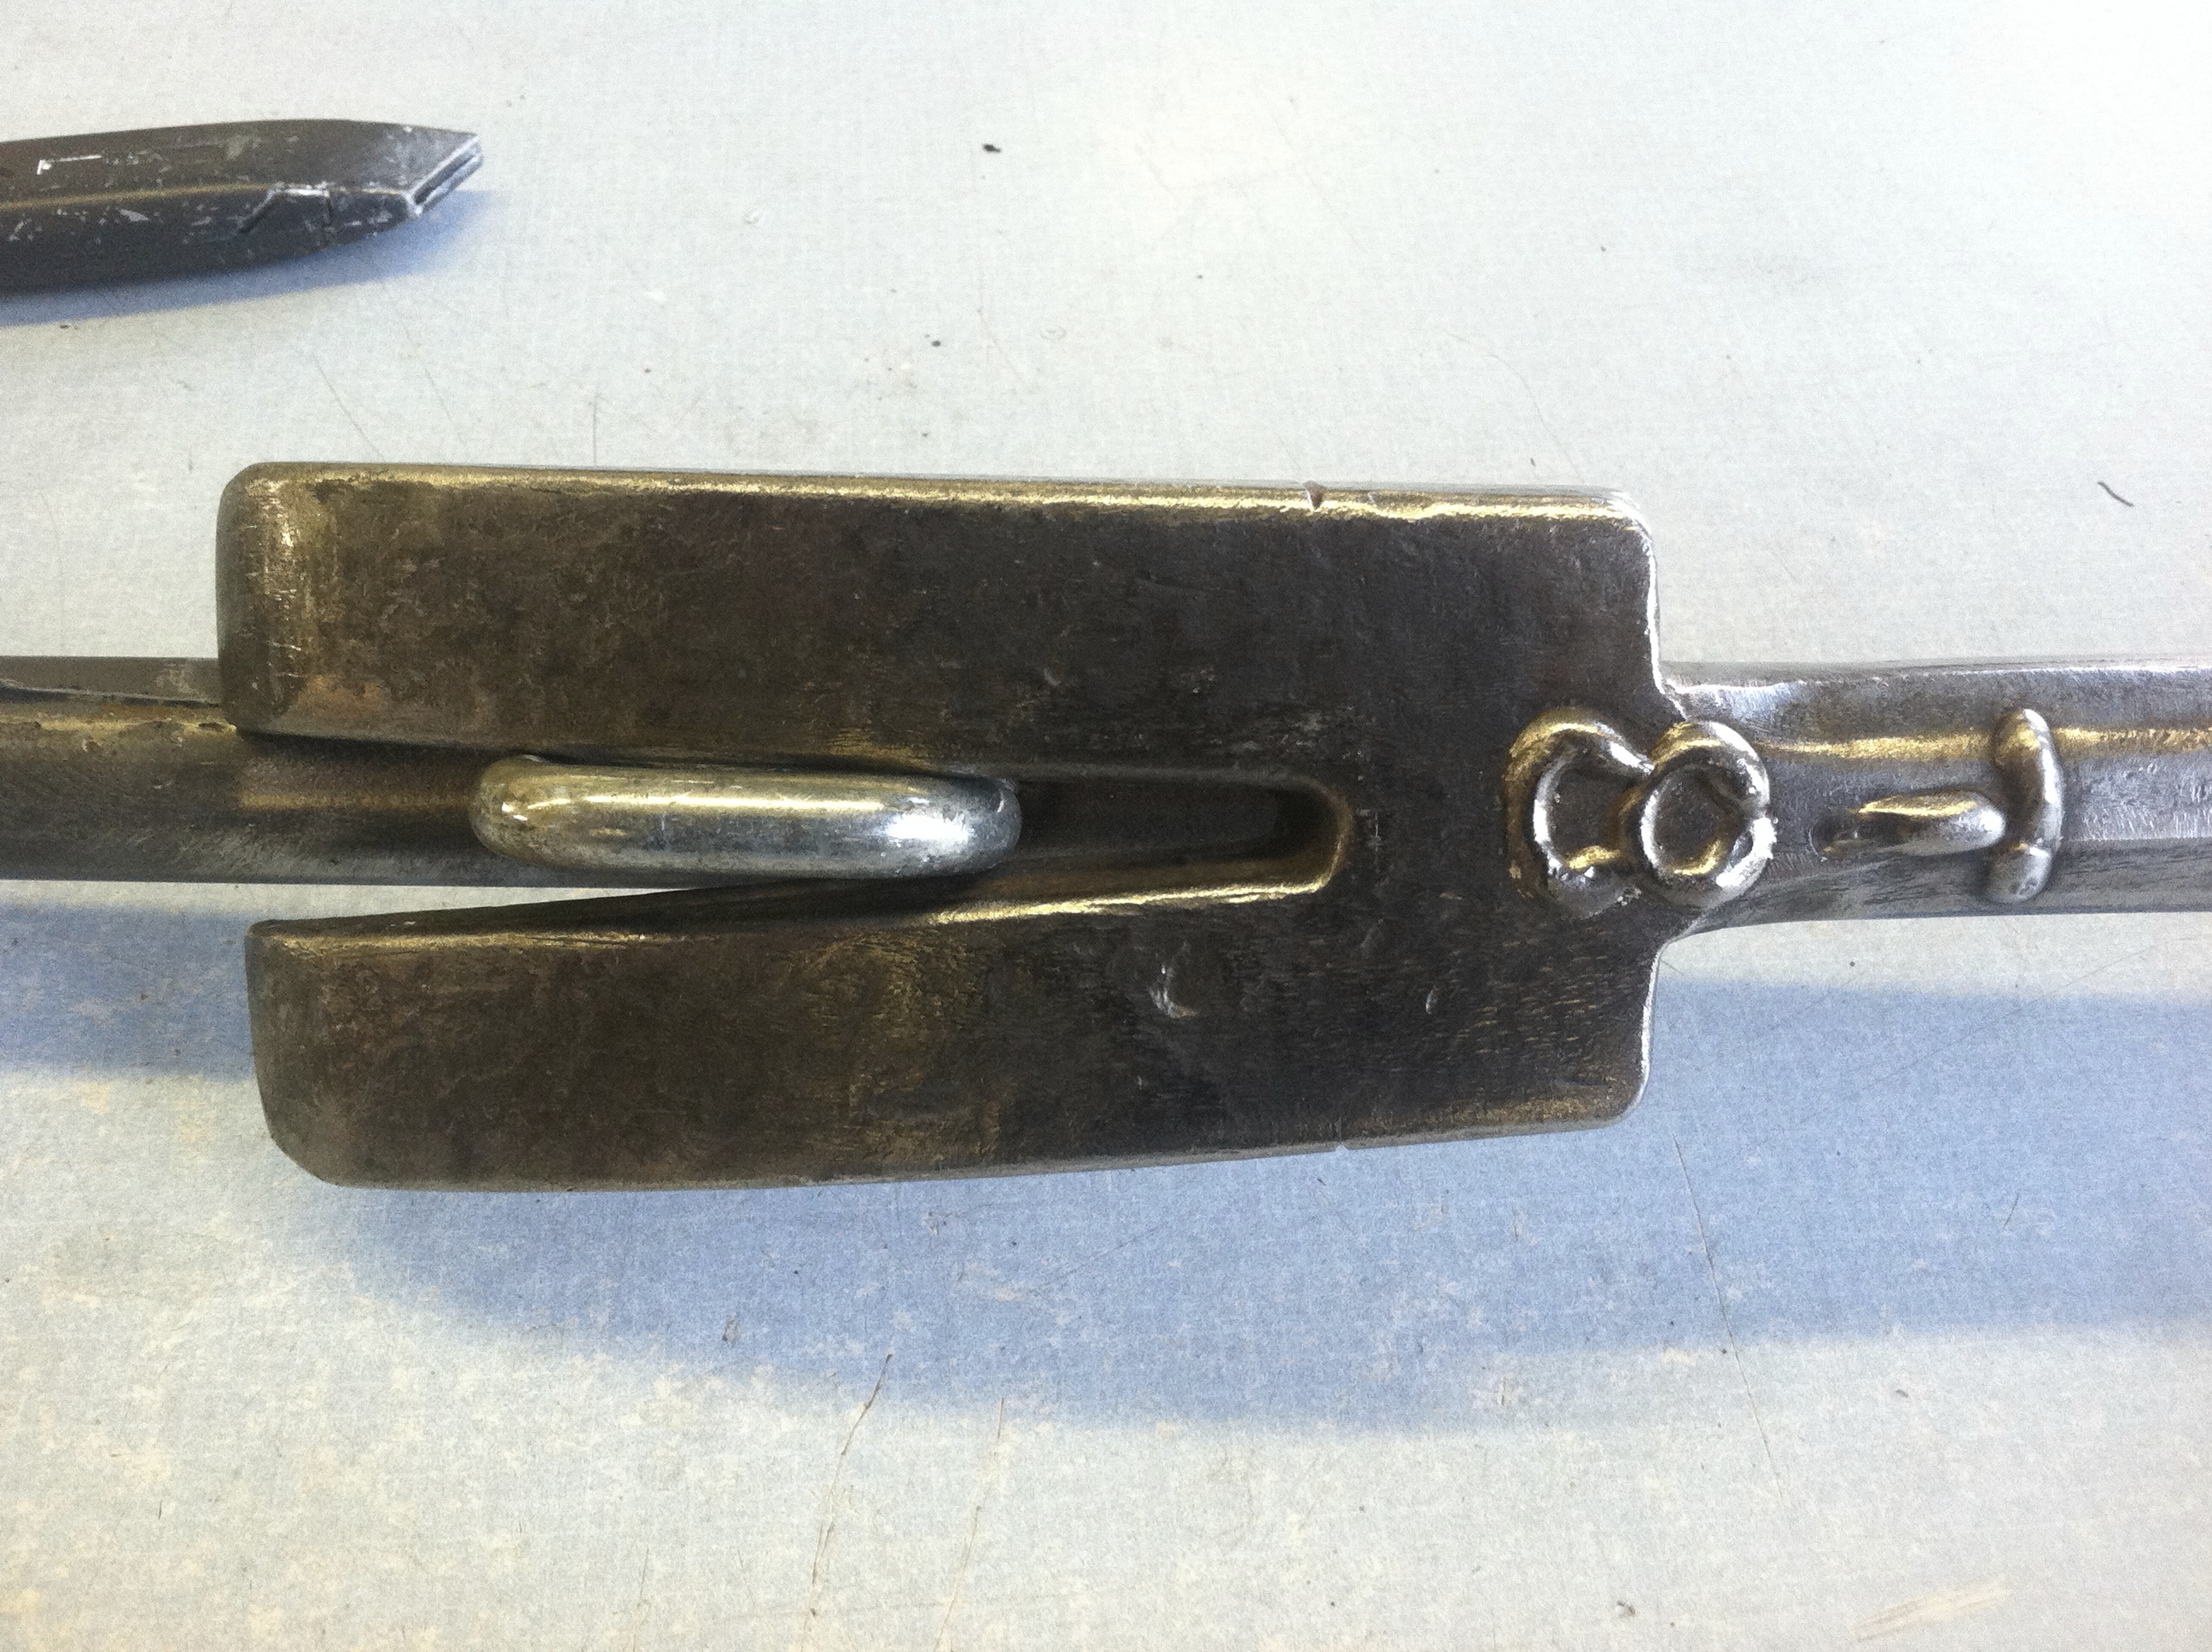
The picture above is after the tool has been slammed on the ground and the Halligan bites the chain. You can see the nice tight fit between the tool heads. Once you find the spacing for your Halligan, make a mark on the chain link and a mark on the roof hook.

Once you have your mark, just use a small tack weld to hold the link to the hook, now put the Halligan back on and just dry fit your mark. Don’t slam the tool down, but see if you like your spacing. If it looks good, run a bead and call it good. I have never had one of these links fail or cause the hook to weaken or bend in any way, shape or form.

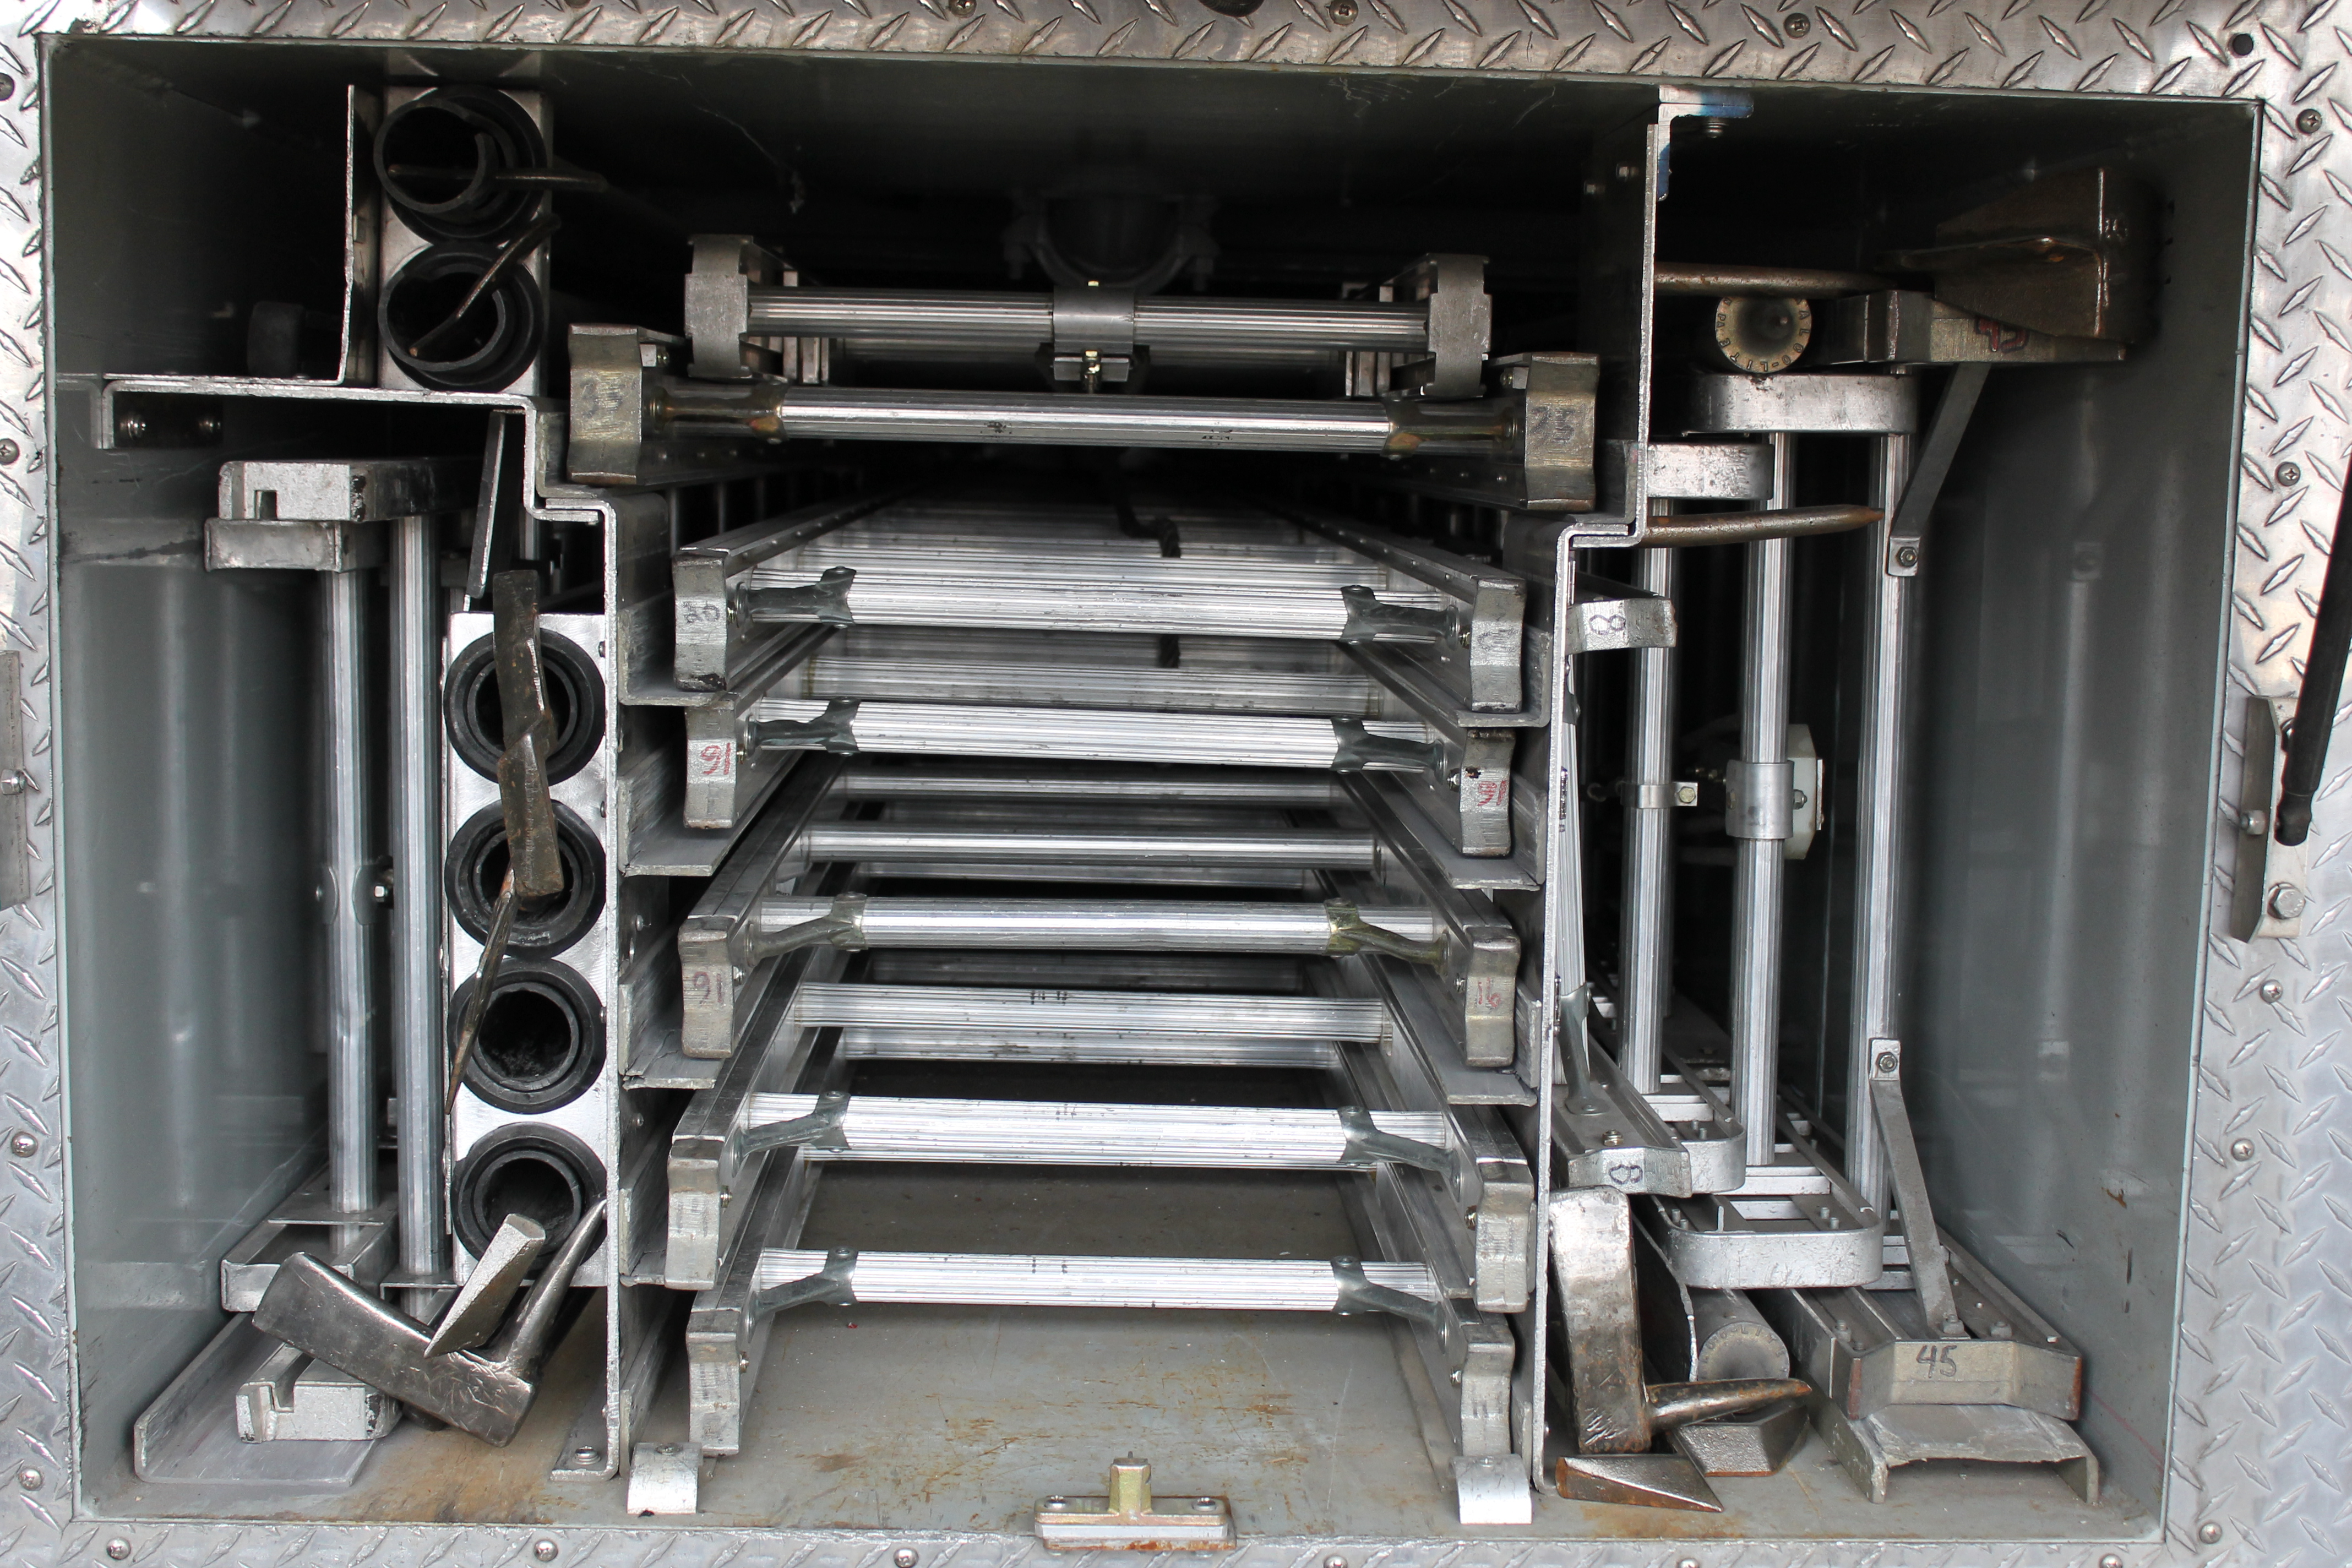
Now you have yourself a set of combat ready outside vent tools. I slide mine in the slot at the bottom left of this ladder compartment, they’re married together and pull out very clean and quick. I pull my tools, then select my ladder and I am ready to move within seconds (no extra fumbling around or assembly required!)


Recent Comments