Most of the doors we put on here have some challenging or unique security features. This is mainly because it makes for good size up practice. However a good portion of our doors out there have some sort of factory lock setups on them. It is important not to forget our basics and underestimate these doors. Poor technique and a lack of a good understanding on common lock setups, will defeat someone just as quick.
Even in higher crime or busy areas of town you will still find occupancies that have not upgraded their security for whatever reason. Some may not do this due to the type of occupancy they are. I’ve seen nightclubs that would rather risk burglaries at night by having normal panic bar setups then risk being fined or shut down due to code violations.
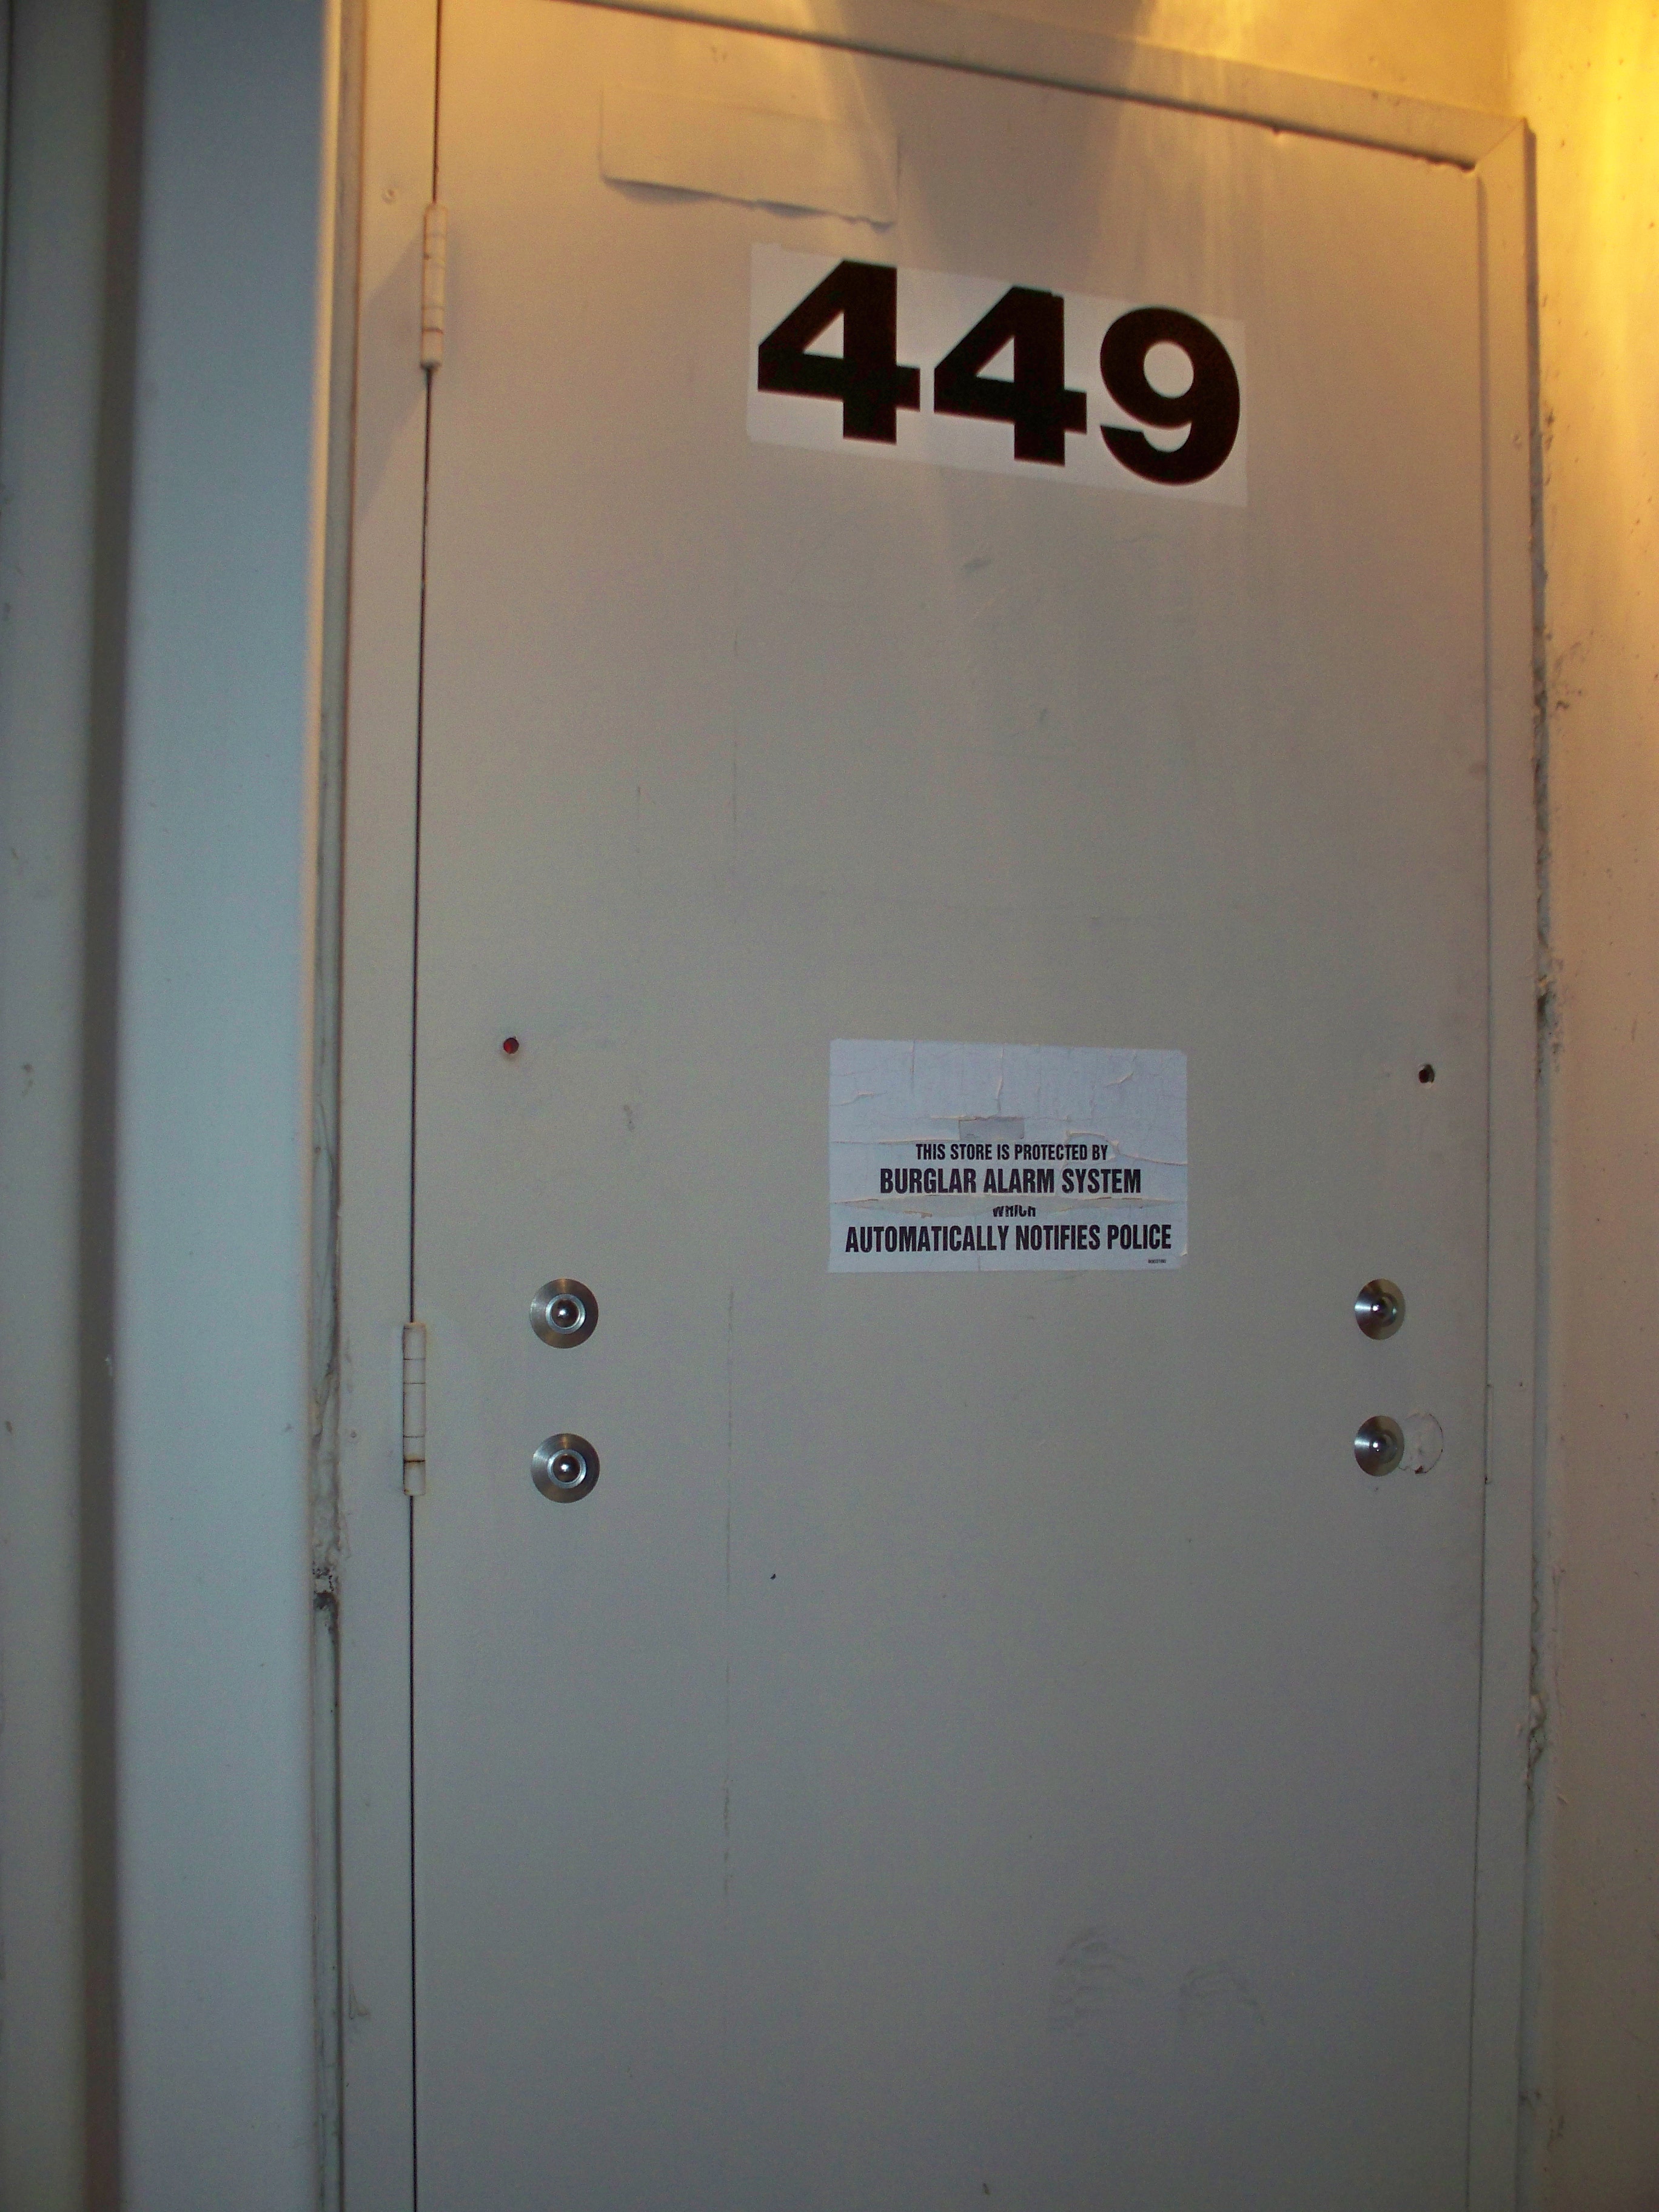
Here is our door in question. This is just a main delivery door on the backside of a church that is located in a larger two story commercial complex. The other occupanices in this building had very heavily fortified doors, however this was the only one we found with what appeared to be stock lock setups.
When we look at this door and hit our key size up points we see:
Commercial Building
Concrete and Masonry Block Constructions
Metal Frame/Jamb
Double Metal Doors
Commercial Rim Lock Indicating Panic Bars.
What we see is what we get on this door. This door does bring up some points that are important to think about. When we are looking at these double doors it is important for us to take note of what the primary door is. On this one it would be the door that has the handle and rim lock on it. On other doors it just may be a door knob and a deadbolt. This is important for a couple of reasons. Many times the primary door has less security to it because it is used more often. Many buildings that do not need the wide access of both doors will use extra locks or slide bolts on the unused side to make it more stable which intern makes the primary door more stable when it latches. Take a look at the inside.
This door is a good example of a common way that panic bars are setup on double doors. The primary door simply has a latch that secures into its keeper mounted on the secondary door. The secondary door has the top and bottom throws connected to its panic bar. This is to keep the door nice and stable for the primary lock.
If we forced the primary door we have a simple irons work door that would be forced very quickly. If we had chosen the secondary door it would have presented a more difficult door with two locks, both of them being blind. The top and bottom throws could easily present complications and slow us down.
This is not a difficult door if we use proper technique and have a solid knowledge of door size up.
The Arm-a-Dor system is the commercially sold solution for a business owner that wants drop bar style security that will still pass an inspection. The district I work in seems to have very few of these, compared to other parts of the city that has newer construction or a large amount of big box chain stores . The trend that I have noticed is that when you do find these they are more than likely being used by larger companies that have standards on how their buildings are secured and are more concerned on staying code compliant over securing their goods. Where you do not find these very often would be in locally owned businesses or the “mom and pop” style businesses.
This system allows you to have a bar that secures both the hinge side and the lock side of a door. If installed properly it provides much longer of a throw than a typical deadbolt or generic panic bar system. It is becoming more popular because of the fact that it is unlocked by the panic bar system allowing them to keep occupants inside safe and pass inspections.
From the outside these doors will have a bolt pattern that presents like most drop bar mounts. The big difference when you look close is the types of washers they use. This is the easiest way for us to identify the system from the outside and puts us one step ahead when trying to determine what we are going up against. These washers are not flat but raise slightly off of the door and then have a recessed area for the heads of the carriage bolts to fit in. They are polished and have a very obvious look to them that they are commercially produced and not just something that was picked up from the hardware store. The angle that is created by the raised washers make the saw blades want to walk compared to the rough edge of a normal washer. The washers are also very large and this makes driving them through the door very difficult.
When the systems are installed properly the bars are designed to extend behind the frames at least an 1 1/2″. This is how they are designed, however due to so many variables in the field, you will find a wide variety of installations that had to be modified. Many times this is better for us because they are poorly done and may only have 1/2 inch or even a 1/4 inch behind the frame or jamb. They can either extend behind the wall, or the frame can be drilled out and the bars can extend into the frame. Both are commonly used.
This above picture is a good example of how the craftsmanship of the installation is what makes this system strong or not. This one has the bar extending the proper length on the lock side of the door but you can see that the hinge side bar barely extends pass the frame. I have seen these the same way on the lock side, which defeats the entire system. This is why always trying conventional Irons work first is a good option. Depending on how these are installed they may pop very easily, if they do not then we move on to plan B. If we do not defeat the door conventionally then we will disable the system by defeating the bolts which still should make quick work of this door. A few other companies make similar systems to this but this is by far the most common in my city. In the end these will never be stronger than a well fabricated steel drop bar with good mounts, but it is a step up from the generic panic bar systems.
There are a wide variety of different types of mortise locks and rim locks, found on both residential and commercial doors. It would be impossible to cover all of the different types of these locks and their variations in one article.
However these locks have something in common. They are very routinely mistaken for each other when someone is practicing size up on these doors. Now there are many key features that can be studied and identified from the outside that would allow you to identify them far before you pull the cylinder. It does take some practice and attention to detail to pick up on these, so that you can efficiently identify them a majority of the time. We may make that an article for another day, for now we feel it is important to cover the bottom line of what needs to be identified to get in these locks.
The above picture is a good example where we may run across these types of locks. This door has a mortise cylinder and a rim cylinder. The top cylinder is a dummy lock that does not operate anything. Since we have the luxury of glass and no conditions behind it, we can easily identify these locks. We see the bars across the door behind the glass which line up with the bottom cylinder. That is our indicator that this will be a rim cylinder operating a panic bar (rim lock). When we look at the cylinder above we can expect this to be our mortise cylinder which is more than likely set in a adams rite mortise lock with a deadlatch. This is the most common lock found in these doors, and if you only have one cylinder showing it is probably this type of lock.
If we decide thru-the-lock is the tactic of choice and we decide to pull the cylinder, there are a few things for us to look at. If we did not know what type of lock we were dealing with before we pulled the cylinder, we can immediately identify it after it is removed. By taking a quick look at the cylinder it will inform us of the type of lock we are going to trip and what end of our tool we will need to use (Either the angled end or the straight end).
Pictured above are the two types of cylinders, the mortise is the dark colored cylinder and the rim is the gold cylinder. Even though these looked almost identical from the outside, you can now see significant differences. The mortise cylinder has the threaded body which holds it in place with a set screw whereas the rim cylinder has the two mounting bolts which connects to a thin metal plate on the back of the door. More importantly we can see the differences in their mechanisms. The mortise cylinder has the cam on the backside which rotates around as the key is turned allowing the small point on the cam to activate the lock. Next when you look at the rim cylinder you can see it has a stem which looks similar to the flat blade of a screw driver. This also turns and activates the lock. The main characteristic to remember from these above pictures is where the action of the lock is taking place. The mortise is activated downward and inside the door. The rim is activated straight back and on the backside of the door.
Here is a break down of each cylinder and lock by themselves.
You can see the mortise cylinder next to the commonly found Adams Rite Mortise Lock. By recognizing the previously discuss parts of this lock like the cam, we know we will be using the angled end of our tool to activate the pin below where the cylinder sat.
This picture is a good view of the mechanism behind mortise cylinders. A good landmark to remember is the open cutout on that arm that resembles a lightbulb. If you remember that cutout looks exactly like the shape of the cam on the back of the lock, and it also points to the exact spot we should place our tool to activate the button that can be seen in this picture. Once the button is depressed we will move the mechanism towards the jamb side of the door to release the latch. Not all mortise locks activate with the exact motion but a large majority of the do have a pin that needs depressed before the action can be made.
Next you can see the rim cylinder as if it had just been pulled.
The key points that we see here are the mounting bolts and the long stem. This reminds us that our lock will be activated straight in on the backside of the door. You can see the tell-tale plus sign on the lock, this is where the stem fits in to activate the lock. Many of these are simple quarter turn locks that is easily done with a flat screw driver.
These locks can be easy to over think, and sometimes you try and use too much force due to the small simple action that typically throws these locks. After you give the lock a quarter turn or until you meet resistance, try the thumb latch if it has one, or pull on the door to make sure you haven’t just unlocked the door but forgot to pull it open before the latch went back into place. This will tend to happen on panic hardware as the latch is more than likely spring-loaded in the locked position.
The bottom line out of all of this is: Rim = Stem= Straight end of the tool Mortise=Cam= Angled end of the tool
To wrap up we have a couple pictures showing you some different ways that mortise cylinders and rim cylinders may present themselves in the commercial setting.
Door number 8 is found on the backside of a 1 story wood frame strip mall, this specific occupancy is some type of ethnic food market. Take a look, run down our key size up points, and see what you think.
We gave you the construction and the occupancy, what else do we see?
1. Metal frame/jamb
2. Commercial metal door
3. Primary Lock is a key in the knob with a latch guard
4. Secondary Lock- Typical deadbolt with latch guard
5. We also see carriage bolts that are in a typical pattern of a slide bolt but an unusal size of the pattern. It is much larger than normal. This pattern is big enough that if we are not paying attention we may mistake it as a drop bar mount or some other type of alternative lock.
To be fair I want to point out that this interior picture is a different door than the exterior picture. Not by much, they have the same locks one is just lacking the latch guards and if you look at the bolt patterns, one of the slide bolts is set closer to the jamb. These were both on the same occupancy I just could not find the interior picture of the door with latch guards. Regardless it does not matter for the sake of the drill.
Taking a closer look at this slide bolt we can see how significant of a throw this door has. Most slide bolts only make it into the jamb an inch or two at the most. This one looks to be 4 inches or more. That would mean unlike the typical slide bolt this will not only go into the metal jamb but all the way into the wood framing for the door. We will probably start to realize this upon attacking this door with the irons. If we determine we cannot defeat this slidebolt with the irons in a decent amount of time we must look at our other ways of attacking this setup.
The latch guards, key in the knob, and deadbolt will be fairly easily and quickly defeated by the irons with tried and true techniques. If the slide bolt is not defeated by way of the conventional techniques on the jamb, we have numerous ways of defeating the carriage bolts either by irons or the saw that will disable this bolt completely.
As you know we are fans of the Irons. We believe in the Irons as our “Plan A” until a door shows us to move on to Plan B (Which still probably involves the Irons). Our opinion is typically the minority when it comes to this thought process, it seems most of the time people lean towards saws as Plan A. Not that saws shouldn’t be in your compliment of forcible entry options, because they absolutely are a necessary tool. However an Irons team that is polished and have a game plan can defeat a wide variety of doors quicker and more reliably than saws on many occasions. Some other big advantages is that Irons will not have mechanical problems, they always start, you will not run out of blade, and almost every rig in the nation carry them. The following technique is great for engine companies and truck companies alike.
Drops bars are a very common secondary security device added to commercial doors. We have shown many different types of drops bars in our door size up posts over the last few months. While there are some limitations depending on the construction of the drop bar mount, a large portion of carriage bolt setups can be defeated with this tactic. This primarily applies to outward swinging metal doors. The mounts are defeated by using a set of Irons to drive the bolts through the door disabling the holding power of the drop bar. The series of pictures below will cover this technique in detail. This combined with conventional forcible entry techniques for the primary locks is a powerful combination.
Sizing up the drop bar is key to determine if this tactic may be successful or not. We have tried this tactic on a wide variety of doors and drop bar setups. By doing this we have found many doors it works well on, and other setups that it may not be your best option. The most common carriage bolts used for drop bars are usually 3/8 inch, which are fairly easy to defeat this way. We have also used this on 1/2 and 3/4 inch carriage bolts with only a little added difficulty. The three doors below are good examples of bolts that can be quickly defeated. If you look closer at the door on the right you can see washers installed, this is one of the best things a business owner can install to prevent his carriage bolts from being defeated. The bolts on the right can still be defeated but they will take longer, the larger the washers the more difficult it will be.
Click the thumbnails below for a bigger picture.
Below are some examples of setups that will slow us down or completely prevent us from using this technique. When you look at the first door you can see the washers are very large, these have so much surface area that it becomes more difficult to drive through the metal. This is not impossible just slower. The next two doors however should tell you to try a different technique. These have steel plates mounted on the outside that are under both of the bolts. You cannot drive these through in an efficient manner. The last photo is an interior look of a drop bar. This bar will look like a good candidate from the outside but as you can see the inside is welded to the door. The list goes on, it is just important to recognize that if the operation is not progressing like it would on most bolts, move on to Plan B.
Enough rambling about the size up part of this operation, here are the steps of actually doing it. We are assigned to a door that needs forced, it has a normal key in the knob lock, a deadbolt and a carriage bolt pattern that is indicating a drop bar. Always start with conventional forcible entry, you never know when the bar has not been put in place and all this door may be is the primary locks. After we attempt our Irons work on the lock side and we determine the drop bar is also part of the resistance, we move on to attacking the bolts. You should start with the bolts on the lock side of the door, not the hinge side. Many times you will only have to defeat those first two bolts and one of two things happen. Either the mount will fall causing the drop bar to fall out, or it may stay in place but you gain enough give in the door to leverage it open. Regardless starting on the lock side is important, and then work your way to the hinge side only if it is needed. After the first set of bolts is defeated go back to conventional forcible entry to see if this was all you needed.
Place the pike of the Halligan either right above or below the bolt head. Try to aim the curve of the pike so it will follow the length of the bolt.
Drive the Halligan in until it is flush with the door, this is the relief hole and it will significantly weaken the metal that holds this bolt, if not completely free it up. While the pike is set, twist the Halligan back and forth once to weaken the material further.
Next center the adze on top of the bolt head and drive it through. This will have a little bit more resistance but should still only take a few hits. If it is not moving through easily, stop and take a look at whats holding it up and reposition.
This should defeat the first bolt. The important thing is to be creative, the doors will not always react and tear the same. But as a rule of thumb this is a great way to start. If the mounts on the back are of solid construction, one variable may arise. The mounting may be too ridgid to be able to drive a bolt completely through while the other one is still in place. If this happens drive the bolt through the outside skin of the door, then move to the other bolt on the same mount and drive it through the outside skin. Once both bolts are in between the two skins of the door you can resume driving them the remaining distance.
The only way to get a feel of this is to try it. Mount an old metal door and put a bunch of bolts on it. Get different sizes, add washers, and add drop bar mounts to the back side. Practicing this technique makes for an effective attack with you Irons. Below is a video demonstrating a full speed drill of us driving some bolts through a commercial metal door. We have some other videos of an interior and exterior footage of an actual drop bar being defeated. We will add that in a second post at a later date. This is already long winded enough for the day.
When you’re talking shop about forcible entry, typically outward swinging doors will come up at some point. You tend to notice that many times firefighters will make their “Plan A” taking the hinges with a saw. I think this is a tactic that gets higher priority then it maybe needs to. Many of these doors that we resort to taking the hinges right away could be easily defeated with a set of irons. I think the saw/hinge tactic is also conveyed by mouth as being a very quick option, but when in reality this can be a time-consuming project. I am not saying it shouldnt be an option, but for me it is usually going to be lower on the list.
Granted there is a big difference in hinges and their quality, which will have an effect on how quick we can cut them. But a big disadvantage is the unknown behind the door. Two of the most common secondary locks that are found in my city are drop bars and slide bolts. These can be the “unknown” that we will not realize until we have spent all of our time cutting those hinges. Whereas if we had started with conventional forcible entry we know what we are going up against and can change our plans based on this.
Outward swinging metal doors can be defeated numerous different ways with the irons. The door we see below is showing our typical key in the knob lock with the common deadbolt above it. We also see a latch guard has been installed and a set of two small bolts higher up to door that could be a smaller gauge secondary lock. This picture is a door where I have heard people say go straight to the saw and the hinges. My personal belief is that an irons team with a game plan and solid irons work will defeat this far before a saw will.
Then take a look at the interior picture, it is a great example of a setup that will make the hinge side that much worse. We have a video we will post on here fairly soon showing numerous different ways of conventional irons work with different lock setups.
This door size up drill is a little different than most of the ones we have posted before. It points out more of a specific lock setup that we find on newer style apartments complexes. These are a great example why it is beneficial to take a look at doors as you walk through them on all the calls we have before the fires.
You can see that the outside of the door only shows your typical handle and deadbolt setup. However once you open the door you can see that this has a second hidden deadbolt that is only operated from the inside. With a wood frame (as shown) this adds very little extra security due to the fact that the jamb is going to split and probably fail at the same time for both locks. However if this setup is found on a metal frame it may hold up better and add some resistence to the door that is not expected until we start our conventional forcible entry on the bottom two locks. Nothing too out of the ordinary here, just worth noting that they are out there and that we should always have plan A, B, C and so on.
Maybe the most important thing to notice about this type of lock setup is what it provides you for search information. This is typically found on apartments that have one door that is used for egress. If we force this in a fire and find that the top deadbolt is locked, we may have a real good indicator that someone is inside the unit. These locks, like security chains, can give us valuable search information if we pay attention to the details.
Here is a thought on one way to make your own pair of modified pliers. They save room in your pockets and are actually much easier to use then the commercially made “key tools”. They provide you with more control and more leverage when tripping locks after removing the cylinders. Obviously making these pliers is not a science but I have had a chance to make 35 or so pairs of these pliers and each time learned a few little specifics that improve them. I have had quite a few people email the website in the last few weeks asking for a post about fabricating these pliers.
Above is a before and after picture of the pliers we are going to make. I only use the # 420 Channellock Brand 9 1/2 inch slip joint pliers. It makes a difference to spend the 12 bucks and buy the quality brand pliers that will last forever. They are made with quality steel and do not use a nut to hold together the handles. After you get your pliers we start our process by cutting off the blue rubber handles with a utility knife .
Now you want to mark the end of the handle that you are going to bend. I have found that the best handle to bend is the longer (what i would call the inside ) handle. It fits better in your hand this way if you are unscrewing a cylinder and also improves the grip on the handle. Plus it keeps the handles pretty close to the same lengths when you are done. I mark the handle at 7/8 of an inch, anywhere within 3/4 to 1 inch should be fine but this has seemed to fit in the mortise locks the best for me. You want to mark the handle on a few sides so that you can see the marks when you are heating and bending the handle.
Now we want to heat the handle. I am writing this based off of a small propane torch because it can be found in the firehouse. If you have an Oxy Acetylene torch you will make quick work of this step in about 5 seconds, but for everyone else we will go this route with the propane. The mark you made with the knife will be your vise mark. This is where we want to concentrate the heating. This process of heating the handle will take anywhere from 5 to 10 minutes depending on how efficiently you hold the torch. It is important to adjust the propane to a good flame and use the hottest part of the flame. Do not hold the torch to close, it will add a lot of time to your heating. You will see the coating burn off in the first few minutes and then eventually you should start to see a faint glow around your mark. Dont bend it right away, heat it for a another minute or two to ensure it is hot enough.
Adjust your vise so that you do not have to turn it very far once you have your handle heated, you lose precious heat if you do not bend the handle very quickly after the heating. As you can see in the picture below the mark we scratched is not where the bend is, I line the teeth of the vise up on both sides of this mark, the bend should occur above the mark. It is important to bend the handle to the outwards position. If you look at the first picture you can see which way it bends. I have bent them inwards to make them more compact, the problem is it will prevent you from closing the pliers all the way and the jaws will not be able to grab many materials. It also makes it more difficult in the open position to use the bent end while tripping mortise locks. When you think you have enough heat stick the handle in the vise, line up your mark and then attempt to bend it to about a right angle. This should not be terribly hard to bend, if it is you have not heated it enough and may crack the steel. You will feel some resistence when it is heat properly but you should not have to put your weight into it.
Next I like to take the two ends and grind them roughly into shape, make sure you don’t go to thin because it is easier to clean them up and fine tune them with the angle grinder. It is hard to describe the size you want to make these end pieces, look closely at the next pictures for a design, but more importantly trying them in some common locks to make sure they fit all of them is important. I will do my best to give you some dimensions and the reasoning behind it.
You can see below the rough shapes we are going for. The straight end is more specific than the angled end. If you roughly make the angled end about 1/8 inch thick at the end and tapered to about 1/8 inch wide you will be in pretty good shape. Just try the sizes in a standard storefront mortise lock. The straight end however has a lot of different locks it needs to fit into. If you make it the right size you can trip all of these locks with ease. If you grind the end of the straight handle to 1/16 thick and 3/16 wide you will have the best all around size. This allows you to trip rim locks with few problems but also allows you to trip your most common tubular deadbolt throws. Many of these deadbolts have plus signs, stars, half moons and other odd shapes. The half moons can be the most difficult. The size that I gave you will fit all of these. The other lock that this thin straight handle will fit into is the “jimmy proof vertical deadbolt rim lock”. These have the self closing shutter that closes when you pull the cylinder. It is important that your handle can not only trip the shutter but also fit in the lock behind it and turn the bolt. Granted that is another story for another day.
These finishing touches and measurements are best done with an angle grinder that has a sandpaper wheel on it. They allow you good control over the material you take off and puts a nice shine on the metal. When that is done I like to take a quality roll of friction tape and wrap a couple passes on both handles.
Now that you have a nice new set of pliers, you need to give them a try. There is no use making them if you don’t put them to work. Any other questions, let me know in the comments section and we will try to answer them.
Bevel to the door or bevel to the jamb?…..that is the question. The main intention of this article is to compare the differences in the two ways the fork end of the Halligan can be used on inward swinging doors. Both ways can be used with very effective results, but knowing why we choose to use one way or the other is important. They both have advantages and disadvantages, but as long as we recognize these advantages and use them in conjunction with each other it makes for a great combination. For clarification we refer to the bevel as the outside of the curve, it will be much clearer when looking at the pictures. This comparison applies to Pro Bar Halligans, although some of the info will pertain to other bars, it is written based of the use of the Pro Bars.
After we obtain a proper gap of the door( based on wood or metal jambs) we must move to our fork and choose to either place the bevel to the jamb (as seen below) or bevel to the door. First we will cover bevel to the jamb. Bevel to the jamb allows us a few advantages when setting the tool to the proper depth. As you can see below the angle of the fork wants to naturally guide itself around the door. Because of this angle it leaves us with much less resistence on a metal frame, and it also helps prevent us from sinking the teeth into a wood jamb. While guiding our bar away from the door while it is being struck we keep the fork moving smoothly around the door. Our disadvantages come after we have the tool set and we are ready to force. This will be discussed below. The next two pictures show the fork being set with the bevel to the jamb.
Next we have Halligan being set with the bevel towards the door. This is probably the most common way setting a Halligan is taught, which is fine as long as we know the potential problems we have to overcome. You can see the curve of the tool is wanting to guide the forks into the frame. This can cause us to feel more resistence when it is hitting a metal frame, or creates much more of an oppurtunity to drive the forks into the jamb if it is wood. The Halligan firefighter has to pay complete attention to guiding the forks in to prevent us from hanging up on the frame. Solid pressure on the tool away from the door as it is being driven is a must to allow it to sink easily to the proper depth. This is the disadvantage of setting the tool with the bevel to the door but the advantages come later. The next two pictures show the halligan being set with the bevel to the door.
If we haven’t lost you to boredom yet, we can now see the remaining advantages and disadvantages. As you see below we are back on the bevel to the jamb. As stated above the bevel to the jamb is easier to set and guide around the door to the proper depth. Where the disadvantage comes in is when we apply the force. The picture below is showing the Halligan applying full force. You can see that the gap it has created is relatively minimal. This is because we are not using the designed leverage point of the Halligan and we have also gone against the design of the forks. This still does not mean this way is wrong because many times this is all the leverage we are going to need, however we need to remember that the Halligan provides more leverage in other ways if it is needed.
The last picture(above) shows us bevel to the door being used. If you scroll back and forth between this picture and the one above it you can see the difference in the gap. We stated earlier that the bevel to the door can be more difficult to set if the door is tight, but as you can see when the bar is set it applies much more leverage. When the bevel is placed to the door it uses the characteristics of the tool to their full potential leverage. The forks grab hold of the backside of the frame and the high point of the bevel is being pushed against the door.
In summary neither way is right or wrong as long as you know why you are placing the bevel the way you choose. Different doors, jambs, and lock setups will call for different ways to put the bevel. A metal frame and metal door that is secured very tightly may call for the bevel to the jamb so that you can set it easier. However if we choose bevel to the jamb and don’t get the leverage we need, we can put a chock in the door or an axe and hold the gap we made. We can then pull the Halligan out and reverse the bevel and continue applying force with the bevel to the door.
This can go on and on, but it is only intended to illustrate the major differences in how you place the bevel. We know this is getting technical, but practicing the different ways regularly makes it become second nature on which way to place it. Again this is just another back to the basics post, nothing new, nothing that we invented. Just passing on great technique tips that has been passed on to us. After this long-winded writeup there is really a simple way to sum it all up:
Bevel To the Jamb= Easier to set, Less leverage to force
Bevel To The Door= Harder to set, More leverage to force
This version of the door size up series is a little different than our previous ones. Below we have multiple doors that have a few things in common. Sometimes the most important part of door size up is recognizing when to move on to another door. Obviously some buildings may have all of their doors that are equally secured and they will all give you trouble. However some doors like the ones below would have been your worst choice to start your forcible entry operations.
These doors all have signs telling us that they are not used very often, or not at all. If they appear they have not been used in years, there is probably a reason. Sometimes we just have to trust what the size up is telling us and move on. Here are the examples.
Door 1
The first door has obvious signs on the outside that it is not being used any more. You can see it has two pieces of steel welded to the frame, covering the outward swinging door. The other side of this door has been covered and walled over. In the lower picture the door would have been behind the shirts that are hanging.
Door #2
This door would have appeared to be pretty straight forward from the outside and has common security features showing. Luckily someone tried to warn us on the door that this is a poor choice to make entry. I am glad to see someone else spells like I do. The door you see in the interior picture is not the one we are looking for. The door we are sizing up is actually behind the shelves containing the cups and bowls.
Door # 3
Lastly we have an aluminum stile storefront door that has become a blockade. This was a side entrance of the building and is obviously rarely used, if at all. This would be easy to identify unless smoke had stained the windows, but it shouldn’t take us long to see this one isn’t a great choice. Could we get through these doors?…..Sure we could eventually, but on these particular buildings it would not have been the best choice, and it means we failed to notice key size up points that would have clued us in to their potential difficulty.
Thanks goes out to our fellow “South Siders” from Engine Co 11 for some of the photos and insight for this post.


Recent Comments